Link: Webpage Points: 110
Useful Tools: file exiftool strings base64 Tags: beginner stego

Show Solution …

The Challenge

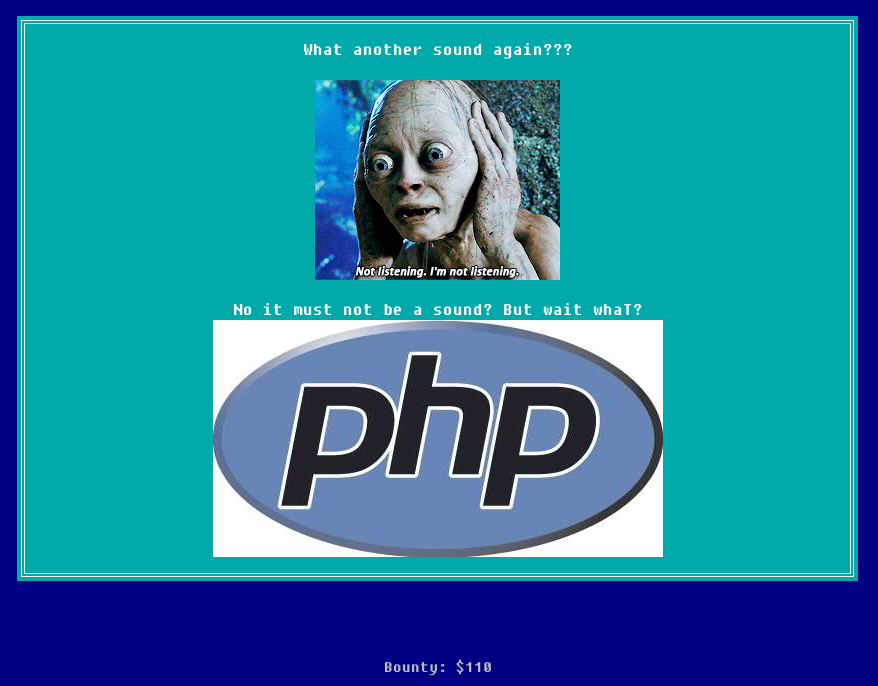
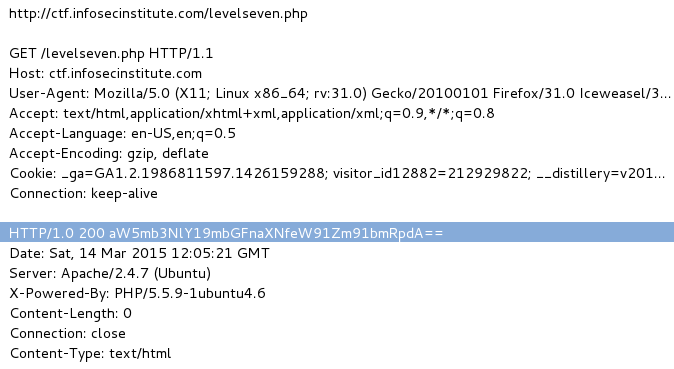
Level 11 provides us with a fairly odd-looking page from the start.

Level 11 Main Page

Looking for more details, the php image file has an interesting name. You can see its name either by looking at the source code, viewing its direct path, or opening its properties in the browser. I happened to look at its properties:

Level 11 Logo Properties

I downloaded the file to analyze it further. Seeing as it calls itself a virus, I ran it through the Linux file command to verify whether or not it was a picture, but sure enough it said that it was indeed a valid jpeg image.

$ file php-logo-virus.jpg
php-logo-virus.jpg: JPEG image data, JFIF standard 1.01, resolution (DPI), density 96x96, segment length 16, Exif Standard: [TIFF image data, big-endian, direntries=6, name=infosec_flagis_aHR0cDovL3d3dy5yb2xsZXJza2kuY28udWsvaW1hZ2VzYi9w], baseline, precision 8, 450x237, frames 3

We actually get the flag right there in the file information! If you didn’t think to run file on the image, you can also find the flag in the image’s metadata (which is where file found it as well, but that won’t always happen).

$ exiftool php-logo-virus.jpg
ExifTool Version Number         : 10.10
File Name                       : php-logo-virus.jpg
  < clipped >
X Resolution                    : 96
Y Resolution                    : 96
Exif Byte Order                 : Big-endian (Motorola, MM)
Document Name                   : infosec_flagis_aHR0cDovL3d3dy5yb2xsZXJza2kuY28udWsvaW1hZ2VzYi9wb3dlcnNsaWRlX2xvZ29fbGFyZ2UuZ2lm.
Profile CMM Type                : Lino
Profile Version                 : 2.1.0
  < clipped >

You could have also found it with strings

$ strings php-logo-virus.jpg
JFIF
Exif
infosec_flagis_aHR0cDovL3d3dy5yb2xsZXJza2kuY28udWsvaW1hZ2VzYi9wb3dlcnNsaWRlX2xvZ29fbGFyZ2UuZ2lm
Photoshop ICC profile
XICC_PROFILE
HLino
mntrRGB XYZ
  < clipped >

However you get there, we’re still not done yet. This doesn’t follow the standard flag format; we need to decode the long string at the end of the flag. Since it has a combination of lowercase, uppercase, and numbers, let’s try base64.

$ echo aHR0cDovL3d3dy5yb2xsZXJza2kuY28udWsvaW1hZ2VzYi9wb3dlcnNsaWRlX2xvZ29fbGFyZ2UuZ2lm | base64 -d
http://www.rollerski.co.uk/imagesb/powerslide_logo_large.gif

Visiting this link gives us an image with text, and that text is the final part of the flag infosec_flagis_powerslide

Lessons Learned

This was another case of attention to detail. The name of the file was a clue to focus on that file. There were many ways of identifying this flag, so understanding each and why they work is beneficial. Remember that you can use grep to search for the flag, as well.

Also, we were once again given a base64 encoded string. This is the third time decoding base64 in this CTF, so hopefully you’re starting to be able to identify it more quickly now and immediately decoding it.

Link: http://ctf.infosecinstitute.com/levelten.php Points: 100
Useful Tools: VLC Audacity Tags: beginner misc

Show Solution …

The Challenge

This amusing page presents us with a picture and a button that brings us to a WAV sound file.

Level 10 Main Page

After a quick look through the source code, I went over to the sound file. It’s about 1-2 seconds of high pitch squeaking noises. There is absolutely no voice discernible in the squeaking, and you would probably be certain listening to it that it’s not just a voice recording sped-up very fast. There was nothing useful in the metadata of the WAV file, but we did see cookie monster from a previous challenge again.

Level 10 VLC

I threw the WAV file into Audacity, a free audio editor, and slowed it down by reducing the sample rate from 44100Hz (what the .wav file was set to) all the way down a more common setting of 8000Hz.

Level 10 Sample Rate

Amazingly, those squeaks actually do turn into an understandable (albeit still fast) voice that reads out the flag to us letter-by-letter: infosec_flagis_sound

Lessons Learned

This lesson introduced us to another new, but very versatile and useful free program called Audacity. It is a very feature-filled audio editor, allowing you to do things such as changing the sample rate (speed) of the audio. Think of it as Photoshop for sound files!

Link: Webpage Points: 90
Useful Tools: Google Tags: beginner web

Show Solution …

The Challenge

We are given a login prompt for what appears to be the web interface of a Cisco Intrusion Detection System (IDS). A quick look at the source code does not provide very much additional information.

Level 9 Main Page

You should try any combination of username and password that you think might get you in. Typical default usernames/passwords are admin/admin, admin/password, root/root, etc. After a while, you may end up needing some help because your attempts all fail. Before brute forcing further, let’s see if there is a documented default username/password that ships with a standard Cisco IDS web interface.

Level 9 Login

We don’t even have to click the link, just read the description. I gave root/attack a try, and sure enough, it was successful! The result was a dialog box like the one below.

Look familiar? At first glance, this looks similar to what we saw a few levels ago where the flag was encrypted through a substitution/rotation cipher. We can still see the underscores and it appears similar to the flag, however the underscores are not in the proper place. It’s also not a straight-forward substitution either seeing as it starts with ss yet the beginning of the actual flag is two different letters in. Maybe it’s a more advanced form of crypto than a simple substitution cipher?

As I started to write it down to attempt some other decryption methods, I realized that the answer was right in front of my eyes the whole time. The flag is just written backwards; reading it forward gives infosec_flagis_defaultpass

Lessons Learned

When you see a login prompt, always search for default credentials for the application that you are logging in to. Many times you will find that they still work. Plenty of websites exist that store the default credentials for a wide variety of applications.

Conversely, make sure to change the default password when you install new services. These passwords are widely known and published.

Finally, a repeat lesson-learned here is pattern recognition. It took me longer than I would have liked to notice that the flag was simply reversed. Not noticing simple patterns can cost significant time due to trying more complicated analysis than is needed, so catching these right away is highly valuable.

Link: Webpage Points: 80
Useful Tools: file strings grep Tags: beginner reverse engineering

Show Solution …

The Challenge

The main page for level 8 presents another file to examine. Of course, I still recommend looking at the source code first just in case there is useful information there as well.

Level 8 Main Page

We learned in the earlier lessons a way to identify what our true file-type is. You should get used to performing this check first to ensure that the file is really what you think it is.

$ file app.exe
app.exe: PE32 executable (console) Intel 80386 (stripped to external PDB), for MS Windows

Looks good; this file truly is a Windows executable. PE32 represents a 32-bit Windows program. Before beginning to reverse engineer this (a surely daunting task), I usually like to first look at the plaintext strings that are buried within the binary file. This is going to return a lot of junk to your screen, but it can be worth sifting through to see if there is are any useful hardcoded strings in there. In this case, the flag string was indeed hardcoded in.

$ strings app.exe
!This program cannot be run in DOS mode.
.text
`.data
.rdata
< clipped >
% Q@
%$Q@
infosec_flagis_0x1a
###########################################
#Welcome to infosec institute net app v1.0#
netstat
-LIBGCCW32-EH-2-SJLJ-GTHR-MINGW32
w32_sharedptr->size == sizeof(W32_EH_SHARED)
%s:%u: failed assertion `%s'
< clipped >

The strings command can give you a decent indication of what the binary executable does when run, which can be a good way to get your bearings before diving in for reverse engineering. In this case, we don’t need to reverse engineer it at all, because the flag is immediately visible. infosec_flagis_0x1a

Note that you can make this much easier to sift through if you use grep to search for what you are interested in. Since you know the flag format, we can search the strings for the flag to see if it’s there.

$ strings app.exe | grep infosec_flagis
infosec_flagis_0x1a

Lessons Learned

This level gave us another commonly used and powerful Linux command: strings. This command will dump out any and all strings that are found in any file you give it, whether its a text file, binary executable, image file, etc. If it’s a binary file, most of the output will be junk (it returns any instance where 4 or more printable characters appear, by default), but you can use grep to search through it if you know what you are looking for. You can also increase the minimum number of characters from 4 to something much higher, such as 10: strings -n 10 app.exe

Link: Webpage Points: 70
Useful Tools: base64 Live HTTP Headers Tags: beginner web

Show Solution …

The Challenge

When you go to level seven via the Levels() dropdown box (as you normally do), you will be brought to the page shown below. You can look at the source code all you like, even look at your cookies and headers, but you won’t find anything here this time.

f00 not found
Something is not right here???
btw...bounty $70

This one calls out your attention to detail, like many CTF challenges do. You may or may not have noticed that each level has been named /levelone.php, /leveltwo.php, and so on. So we should be on /levelseven.php now then, right? Take a look at your URL; the dropdown box to take you to level 7 brought you to /404.php. Strange.

Seeing as there isn’t anything here, let’s try going directly to /levelseven.php ourselves by manually typing it in the address bar of the browser. Doing so take us to a completely blank, white page with nothing on it at all. Even the source code is completely empty. This tells us something is here, though; if the page didn’t exist, we would have gotten an error from the server. The fact that we have this blank page means this page does actually exist and must do something that it’s not telling us. One thing that we haven’t tried in previous challenges is looking at the header content of HTTP requests.

This header content I’m referring to is different from the <head> ... </head> section of HTML source code. Instead, I’m referring to the actual HTTP headers, the information that is included with GET/POST requests and server responses. There are a variety of ways to view this information, such as capturing your traffic with Wireshark, using an intercepting proxy, or using the developer tools (F12) of your browser. We already used an addon for Firefox to view and edit cookies earlier, so I’ll introduce another Firefox addon to view header data.

Live HTTP Headers is a great addon to view your header traffic. Once installed, you can launch it in the Tools menu of Firefox to start capturing. Refresh the blank challenge page, and you’ll see the header traffic appear.

HTTP Headers

As always, being able to identify patterns or other interesting lines of text can save you a lot of time. The line highlighted above should jump out to you as being “potentially interesting” like that. From our previous lessons learned, you should also be able to identify what this text is. You see lowercase and uppercase characters, numbers, and some “=” signs at the very end, which tells you that this is more than most likely a base64-encoded string.

Send it through the decoder that you used on level two and you’ll get the flag: infosec_flagis_youfoundit

Lessons Learned

This is yet another case of “don’t trust anything in a CTF challenge.” Your trusty level-selector drop-down box brought you to the wrong place, and you had to figure out the right location based on noticing a standard naming convention.

Throughout a CTF challenge, attention to detail is absolutely critical. Make mental or physical notes when you notice naming conventions or other patterns; it may be useful later.

We also learned about examining HTTP headers. It’s another good place to look if you don’t find any clues in the source code or cookies.

Finally, we revisited a past lesson on the identification and decoding of base64 strings. Knowing what doesn’t look normal will take some experience, but you will find that you pretty much always want to try decoding any base64 strings you see; there is usually always some kind of valuable data behind it, at least in a CTF.

Link: Webpage Points: 60
Useful Tools: wireshark Tags: beginner network

Show Solution …

The Challenge

At the start of the level, we are prompted to download the file sharkfin.pcap. If you have never seen a filetype like this and don’t know what to do with it, tthe filename is a hint for what tool to use. The program Wireshark has a shark fin logo and it is used to open up network packet capture dumps (.pcap). If you didn’t know about Wireshark, a Google search on how to open PCAP files would point you to it.

Level 6 Main Page

There is a lot going on in this packet capture; if you are new to Wireshark, what you are seeing can look fairly overwhelming or daunting. If you scroll for a while through all of the packets, you may start to notice that the vast majority of them are HTTPS and encrypted packets. We can’t decrypt these packets without a key, so let’s look at the non-encrypted packets first. The very first packet is UDP and plaintext/readable. If you select it and look at its hex content on the bottom of the screen, you will see a string of hex values.

Level 6 Hex Data

The data that we care about is in the right-most section. See any patterns or key characteristics of those values? You may notice that there are a lot of 6’s and 7’s in there, which is a good indicator that this hex represents ASCII characters (lowercase letters fall in the hex 61-7A range). Take a look at this ASCII table to verify. Let’s try converting those numbers from hex to ASCII and see if we get anything readable.

You can use either an online decoder, a hex editor, or a script to convert this from hex to ASCII. This will result in the flag: infosec_flagis_sniffed

Lessons Learned

The main skill gained here is some proficiency with using Wireshark. Wireshark can look intimidating at first glance, but it won’t take long to get used to working with it. It also has a lot of features for sorting through all those packets, making your analysis job much easier. See other network challenges for more examples of using Wireshark.

The next lesson learned was how to identify hex-encoded ASCII and convert it back to a string. Hex values can be written as just the number 60 or with the prefix 0x, such as 0x60. It really depends on what you are looking at to know which you will see; in the case of this pcap file, it just had the numbers without the prefix. In this case, it is up to you to simply notice that they are hex values (versus decimal), and notice that they are potentially worth investigating. Remember, if you see a lot of numbers in the hex 60-70s back to back, it is probably an ASCII string. Being able to quickly spot patterns like this can save you a lot of time.

Lastly, you gained a fourth decoder/converter for your back-pocket. The base64 and hex decoders will likely be your most-used.

Link: Webpage Points: 50
Useful Tools: steghide Tags: beginner stego

Show Solution …

The Challenge

Before we’re presented with the main page of this level, we have what seems to be an endless stream of popups preventing us from getting through that all say “Hacker!!!” (looks like they’re on to us). Luckily, most browsers won’t accept that for long, and your pop-up should provide you with an option that says something similar to “Prevent this page from creating additional dialog boxes” after two or three of these come up.

Level 5 Main Page

We now reach the main page. It is fairly minimal, consisting of just an image. As with any challenge, take a look through the source for more clues on where to look next. In this case, there isn’t much there either, and there aren’t any new cookies.

There isn’t much left to examine besides the picture, so let’s download it and see if it has anything hidden away inside. You can use a tool like exiftool on Linux to take a deep look into the metadata for clues, but in this case there is nothing there. Running out of options, we can try looking for any steganography, or hidden data within the image itself. I did this with Linux, but you could also download a Windows steganography program (like SilentEye) instead. To do it with Linux, I used the steghide tool. If the image doesn’t have any steganography in it, it will come up blank, so no harm in trying. It will ask you for a password, but seeing as I had no idea what that would be, I just left it blank.

$ file aliens.jpg
aliens.jpg: JPEG image data, JFIF standard 1.01, resolution (DPI), density 72x72, segment length 16, baseline, precision 8, 461x403, frames 3
$ steghide extract -sf aliens.jpg
Enter passphrase:
wrote extracted data to "all.txt".
$ cat all.txt
01101001011011100110011001101111011100110110010101100011010111110110011001101100011000010110011101101001011100110101111101110011011101000110010101100111011000010110110001101001011001010110111001110011

I sent that string over to a binary-to-ASCII converter, and it decodes into the flag: infosec_flagis_stegaliens

Lessons Learned

This level may have left you banging your head for a while. There was a lot that you probably tried before jumping right into steganography, but all would have come up short for anything useful. In all of these levels, the most important lesson is maintaining persistence to complete the challenge. Don’t give up! The answer won’t always be obvious.

This may have also been your first experience with steganography. You learned how to pull embedded data out of a seemingly innocent image file, and conversely, you could learn how to put data in there yourself with just another few minutes of experimenting.

Lastly, you gained a third decoder to put in your back-pocket for future use!

Link: Webpage Points: 40
Useful Tools: Ctrl+U Cookies Manager+ Tags: beginner web crypto

Show Solution …

The Challenge

This page presents us with a picture of a cookie monster doll along with the HTTP acronym. Of course, I recommend looking at the source code as one of the first steps so that you can be sure you understand the functionality of the website. You might find something that you didn’t expect!

Level 4 Main Page

You will also notice pretty quickly that you get a dialog box that pops up every time you move your mouse over the picture. Besides being funny (and slightly annoying), it provides no other function as far as we can see.

Stop poking me

We can verify that it doesn’t do anything else by checking the source code. In there you will find that the poke() function is called whenever the onmouseover event happens. The poke function was defined under the custom.js file, which you can also find referenced in that source code.

function poke() {
	alert("Stop poking me!");
}

function learn() {
	alert("You just got trolled");
}

Sure enough, the dialog box does nothing but provide that message. Seeing as that’s a dead end, we’ll move on. When you get stuck during a CTF, you should always consider if they left you any hints. In this case, the fact that we have a picture of the cookie monster is probably of no coincidence. Maybe we should look at browser cookies?

Finding your browser cookies is different for every browser, but a quick Google search will bring you to the right place. Personally, I like to use the Cookies Manager+ addon for Firefox, which lets you both view and edit cookies. You should find one cookie from the CTF named fusrodah with some encrypted/encoded content.

Copy the cookie contents into Notepad to try to start figuring out how to decipher it. It doesn’t look like Base64 or anything else we’ve seen thus far. On the next line down, I wrote out the start of our end-goal flag format (“infosec_flagis_”).

vasbfrp_syntvf_jrybirpbbxvrf
infosec_flagis_

Notice any patterns? The underscores line up perfectly. Also notice that f and s match between the two lines in two different places. It looks like this is going to be some kind of substitution cipher; all this is doing is substituting one letter for another. You may also notice that the substitution is “in order,” versus random (this makes it a rotation cipher). For example, a decrypts to n and b decrypts to o. If we had a c, we can assume correctly that it would decrypt to p. You could first start by solving for every letter that you know, leaving only the unknowns:

vasbfrp_syntvf_jrybirpbbxvrf
infosec_flagis_?elo?ecoo?ies

Continue decrypting through the alphabet rotation for the rest of the flag. You can always make a logical guess as to the remainder of the flag since it’s mostly solved, but unfortunately this CTF doesn’t have a way for you to verify your answer, so you need to prove it on your own. For the rotation cipher, there are also websites where you can try all 25 cipher rotations very easily and quickly. infosec_flagis_welovecookies

Lessons Learned

Check for cookies! Cookies usually always have their values encoded or encrypted, but sometimes you will find plaintext information in them as well. If you can decode or decrypt them, the information that they contain could be valuable, or you could even modify them.

Additionally, we learned how to spot a substitution cipher at a quick glance, based on our known flag format, as well as how to decrypt it via tool or by hand if needed.

Link: Webpage Points: 30
Useful Tools: QR scanner Tags: beginner misc

Show Solution …

The Challenge

This level presents us with a QR-code and a seemingly never-ending progress bar. If you take a look at the source code for the page, you will find that the progress bar is actually made to be permanently stuck at 90%, so this is just a distractor and doesn’t mean anything at all.

Level 3 Main Page

To scan the QR-code, I pulled out my smartphone and opened up a barcode scanning app (most also read QR codes). There are also websites that allow you to upload images of QR codes (and other types of image-based codes) if you don’t have a phone handy. After scanning the QR code, the output is a text sequence of dots and dashes. This looks very similar to Morse Code, so the easiest way to find out is to copy/paste it into a decoder and see if the output makes sense. I’m not aware of a Linux tool that does this, so the easiest option is probably to find a web-base decoder.

Morse Code Output

The output above comes from this website. Since Morse Code does not have _ characters, we add those back in manually after decoding so that we match the right flag format, giving us the final flag. infosec_flagis_morsing

Lessons Learned

Here we revisited two previous lessons-learned. First, never trust what is given to you in a CTF challenge. You can wait all day and this progress bar will never complete, nor does it have anything to do with finding the flag. Second, always look at the source code so that you can see how the page is designed. In this case, looking at the source code tells you immediately that this progress bar is hard-coded to be at 90%.

Additionally, you learned how to identify, scan, and get the output of a QR code if you had never done that previously. Furthermore, you saw what Morse Code looks like in text form, and now have another decoder in your back pocket to use in the future should you run across it again.

Link: Webpage Points: 20
Useful Tools: wget file cat base64 Tags: beginner web

Show Solution …

The Challenge

Visiting level 2 brings us to the page that you see below. It has a broken/unrenderable image file and some text asking us to take a look at it.

Level 2 Main Page

Sure enough, if you try to navigate directly to the image in your browser, it will fail to load. Some browsers, such as Chrome, will simply show a blank screen. Other browsers, such as Firefox, may present an error:

The image "http://ctf.infosecinstitute.com/img/leveltwo.jpeg" cannot be displayed because it contains errors.

I downloaded the image file to my Linux machine to start examining it closer. A quick method is to copy the URL and pass it to wget.

$ wget http://ctf.infosecinstitute.com/img/leveltwo.jpeg

I figured I would start by making sure that this really is an image file like they said it was. To do this, you can use the Linux command “file” to get a report of what kind of file it is.

$ file leveltwo.jpeg
leveltwo.jpeg: ASCII text

This says that it is an ASCII text file, which sure isn’t an image file. Seeing as it is just a text file, we should be able to open it up with a simple text editor (e.g., notepad on Windows, vi or nano on Linux). You could also just use the Linux “cat” command to display the contents directly to your terminal instead of opening up an editor.

$ cat leveltwo.jpeg
aW5mb3NlY19mbGFnaXNfd2VhcmVqdXN0c3RhcnRpbmc=

It definitely doesn’t look like the flag, so what is it? In this case, we can tell that this is probably Base64-encoded data. How can you tell? The fact that we are seeing a lot of uppercase and lowercase characters mixed in with numbers is a good indication, first of all; secondly, there are no symbols except for the trailing = sign. Base64 strings are often found ending with = or == or no symbol at all. If you’re unsure, just try decoding it and see if you get back anything legible. There are plenty of websites that you can search for that will decode Base64 strings for you, but I would recommend learning the Linux way. Below are three different ways you could achieve the same goal.

$ base64 -d leveltwo.jpeg
infosec_flagis_wearejuststarting

$ cat leveltwo.jpeg | base64 -d
infosec_flagis_wearejuststarting

$ echo aW5mb3NlY19mbGFnaXNfd2VhcmVqdXN0c3RhcnRpbmc= | base64 -d
infosec_flagis_wearejuststarting

Sure enough, there is our second flag: infosec_flagis_welcome

Lessons Learned

From a CTF challenge standpoint, the first lesson learned is that you should never trust what is provided to you. In this case, they gave you a file ending in .jpeg that was actually just a plain text file. Just because it has a certain extension doesn’t mean that’s what it really is.

You also learned how to tell what type of file something is if you weren’t sure to begin with or want some form of positive confirmation. Knowing the file type can save you a lot of time for more complex files in the future.

Lastly, you learned how to identify a Base64 string and how to decode it back into the original data. Base64 is found very commonly over the web, so this won’t be the last time that you see it. Knowing how to quickly identify it and decode it will be valuable.